外观
5.单元测试 : 搭建 Vitest 的单元测试环境
1756字约6分钟
2024-10-06
这节我们来学习如何给组件库添加单元测试。
在 Vite 栈的项目中,首推 Vitest 作为测试框架。
为什么选择 Vitest?
在 Vitest 之前,前端普遍的测试框架是 Jest。Jest 是由 Facebook 开源的一款测试框架,它本身集成了断言库、mock、快照测试、覆盖率报告等功能。比如 Vue3.0, 还有流行的 ElementUI 组件库都是使用 Jest 完成的单元测试。
Vitest 是一个基于 Vite 的测试框架,它可以做到与 Vite 通用配置。也就是说,如果你在 Vite 中使用插件支持了 JSX 语法,做单元测试的时候就无需再配置一遍了,这点非常重要。并且 Vite 兼容了大部分 Jest 的使用方法,这样以往 Jest 的使用经验依然可以用在 Vitest 中使用,没有太多的重复学习过程。另外 Vitest 更加注重性能,尽可能多地使用 Worker 线程并发执行,可以提高测试的运行效率。
总结一下 Vitest 的优点:
- 与 Vite 同配置;
- 大量兼容 JestAPI;
- 高执行效率;
用户故事 (UserStory)
通过 Vitest 实现对组件的单元测试。
任务分解 (Task)
- 搭建 Vitest 单元测试环境。
任务实现
搭建测试环境
pnpm i -D vitest@"2.1.2" happy-dom@"15.7.4" @vue/test-utils@"2.4.6"配置 Vitest 测试组件库,需要以下三个库:
- vitest :测试框架,用于执行整个测试过程并提供断言库、mock、覆盖率;
- happy-dom:是用于提供在 Node 环境中的 Dom 仿真模型;
- @vue/test-utils 工具库: Vue 推荐的测试工具库;
@vue/test-utils 工具库是为了简化 vue 的测试过程而设计的。实际上使用 jest 或者 vitest 也可以直接对 vue 的进行测试。但是如果每次都需要编写初始化 vue 实例、渲染组件等操作,并且对 Dom 断言也比较繁琐。
比较好的办法是将这些针对 vue 测试的过程进程封装。当然这些封装是针对虽有 vue 项目通用的,这也就是 @vue/test-utils 的来历。
首先,需要在 vite.config.ts 中增加 Vitest 配置。
/// <reference types="vitest/config" />
import { defineConfig } from "vite";

export default defineConfig({
  // ...
  test: {
    // enable jest-like global test APIs
    globals: true,
    // simulate DOM with happy-dom
    // (requires installing happy-dom as a peer dependency)
    environment: "happy-dom",
  },
});
解释一下其中的重要属性。
enviroment 属性中配置了 happy-dom,用于提供测试所需要的 DOM 仿真。测试是在 node 环境中运行的,而不是浏览器中,需要提供一个 DOM 对象的仿真。
代码的小重构
测试之前做一个代码的小重构。就是给每一个组件添加一个入口 index.ts。
将原来 src/button 目录下的 index.tsx 重命名为 Button.tsx,然后在 src/button 目录新建 index.ts 文件,导出 Button 组件:
import Button from "./Button";

// 导出Button组件
export default Button;
编写测试用例
新建 src/button/test/Button.test.ts 测试文件:
import Button from "../Button";

import { shallowMount } from "@vue/test-utils";
import { describe, expect, test } from "vitest";
// 测试分组
describe("Button", () => {
  // mount
  test("mount  @vue/test-utils", () => {
    // @vue/test-utils
    const wrapper = shallowMount(Button, {
      slots: {
        default: "Button",
      },
    });

    // 断言
    expect(wrapper.text()).toBe("Button");
  });
});
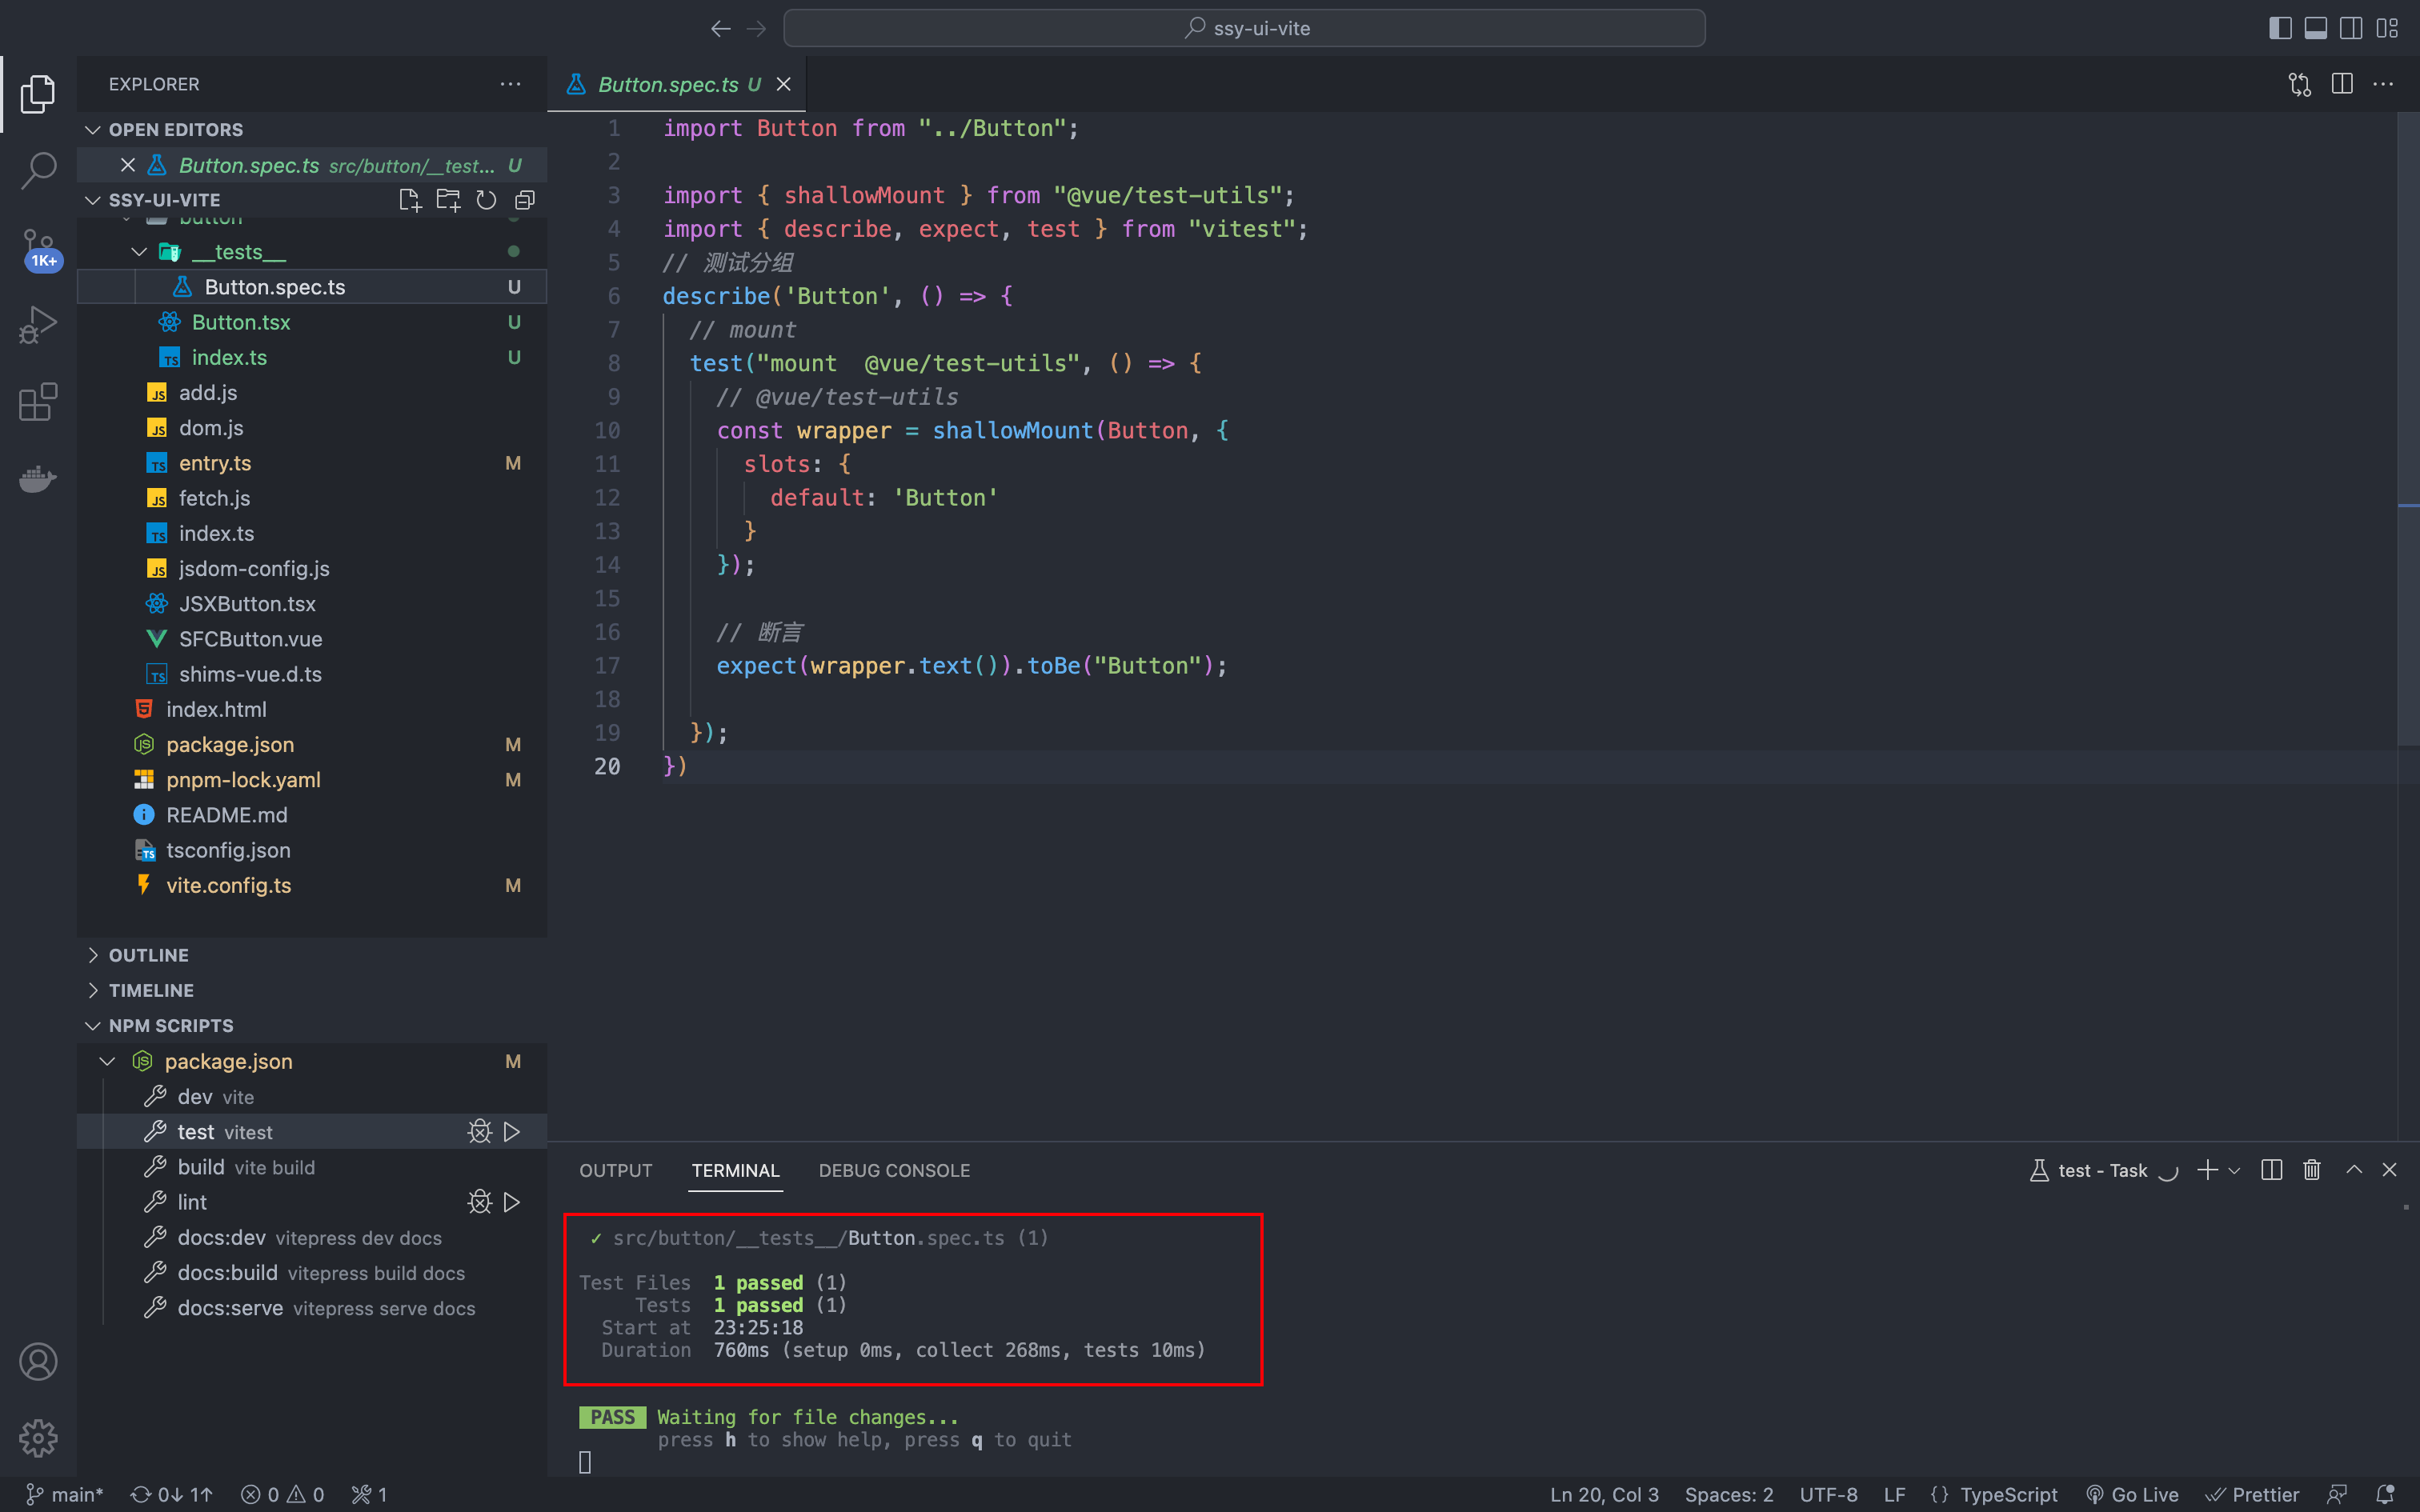
在测试文件中创建一个 describe 分组。在第一个参数中输入【Button】,表明是针对 Button 的测试。编写测试用例 test ,使用 shallowMount 初始化组件,测试按钮是否工作正常,只需要断言判断按钮中的字符串是否正确就可以了。
在 package.json 中增加测试运行脚本:
{
  "scripts": {
    "test": "vitest"
  }
}
然后就可以启动 Vitest 单元测试了:
pnpm test测试结果:  上面的测试只是测试了按钮的默认状态。
对于按钮组件来讲,它的主要逻辑是:根据不同的 props 属性来定制不同的样式。
下面我们针对这些逻辑继续编写测试。
比如: color 属性是根据传入的不同条件定义不同的颜色,只需要让断言判断是否加载不同的属性就行了。
- Color: default
| 输入:color | 输出:css |
|---|---|
| 空(默认) | bg-blue-500 |
| red | bg-red-500 |
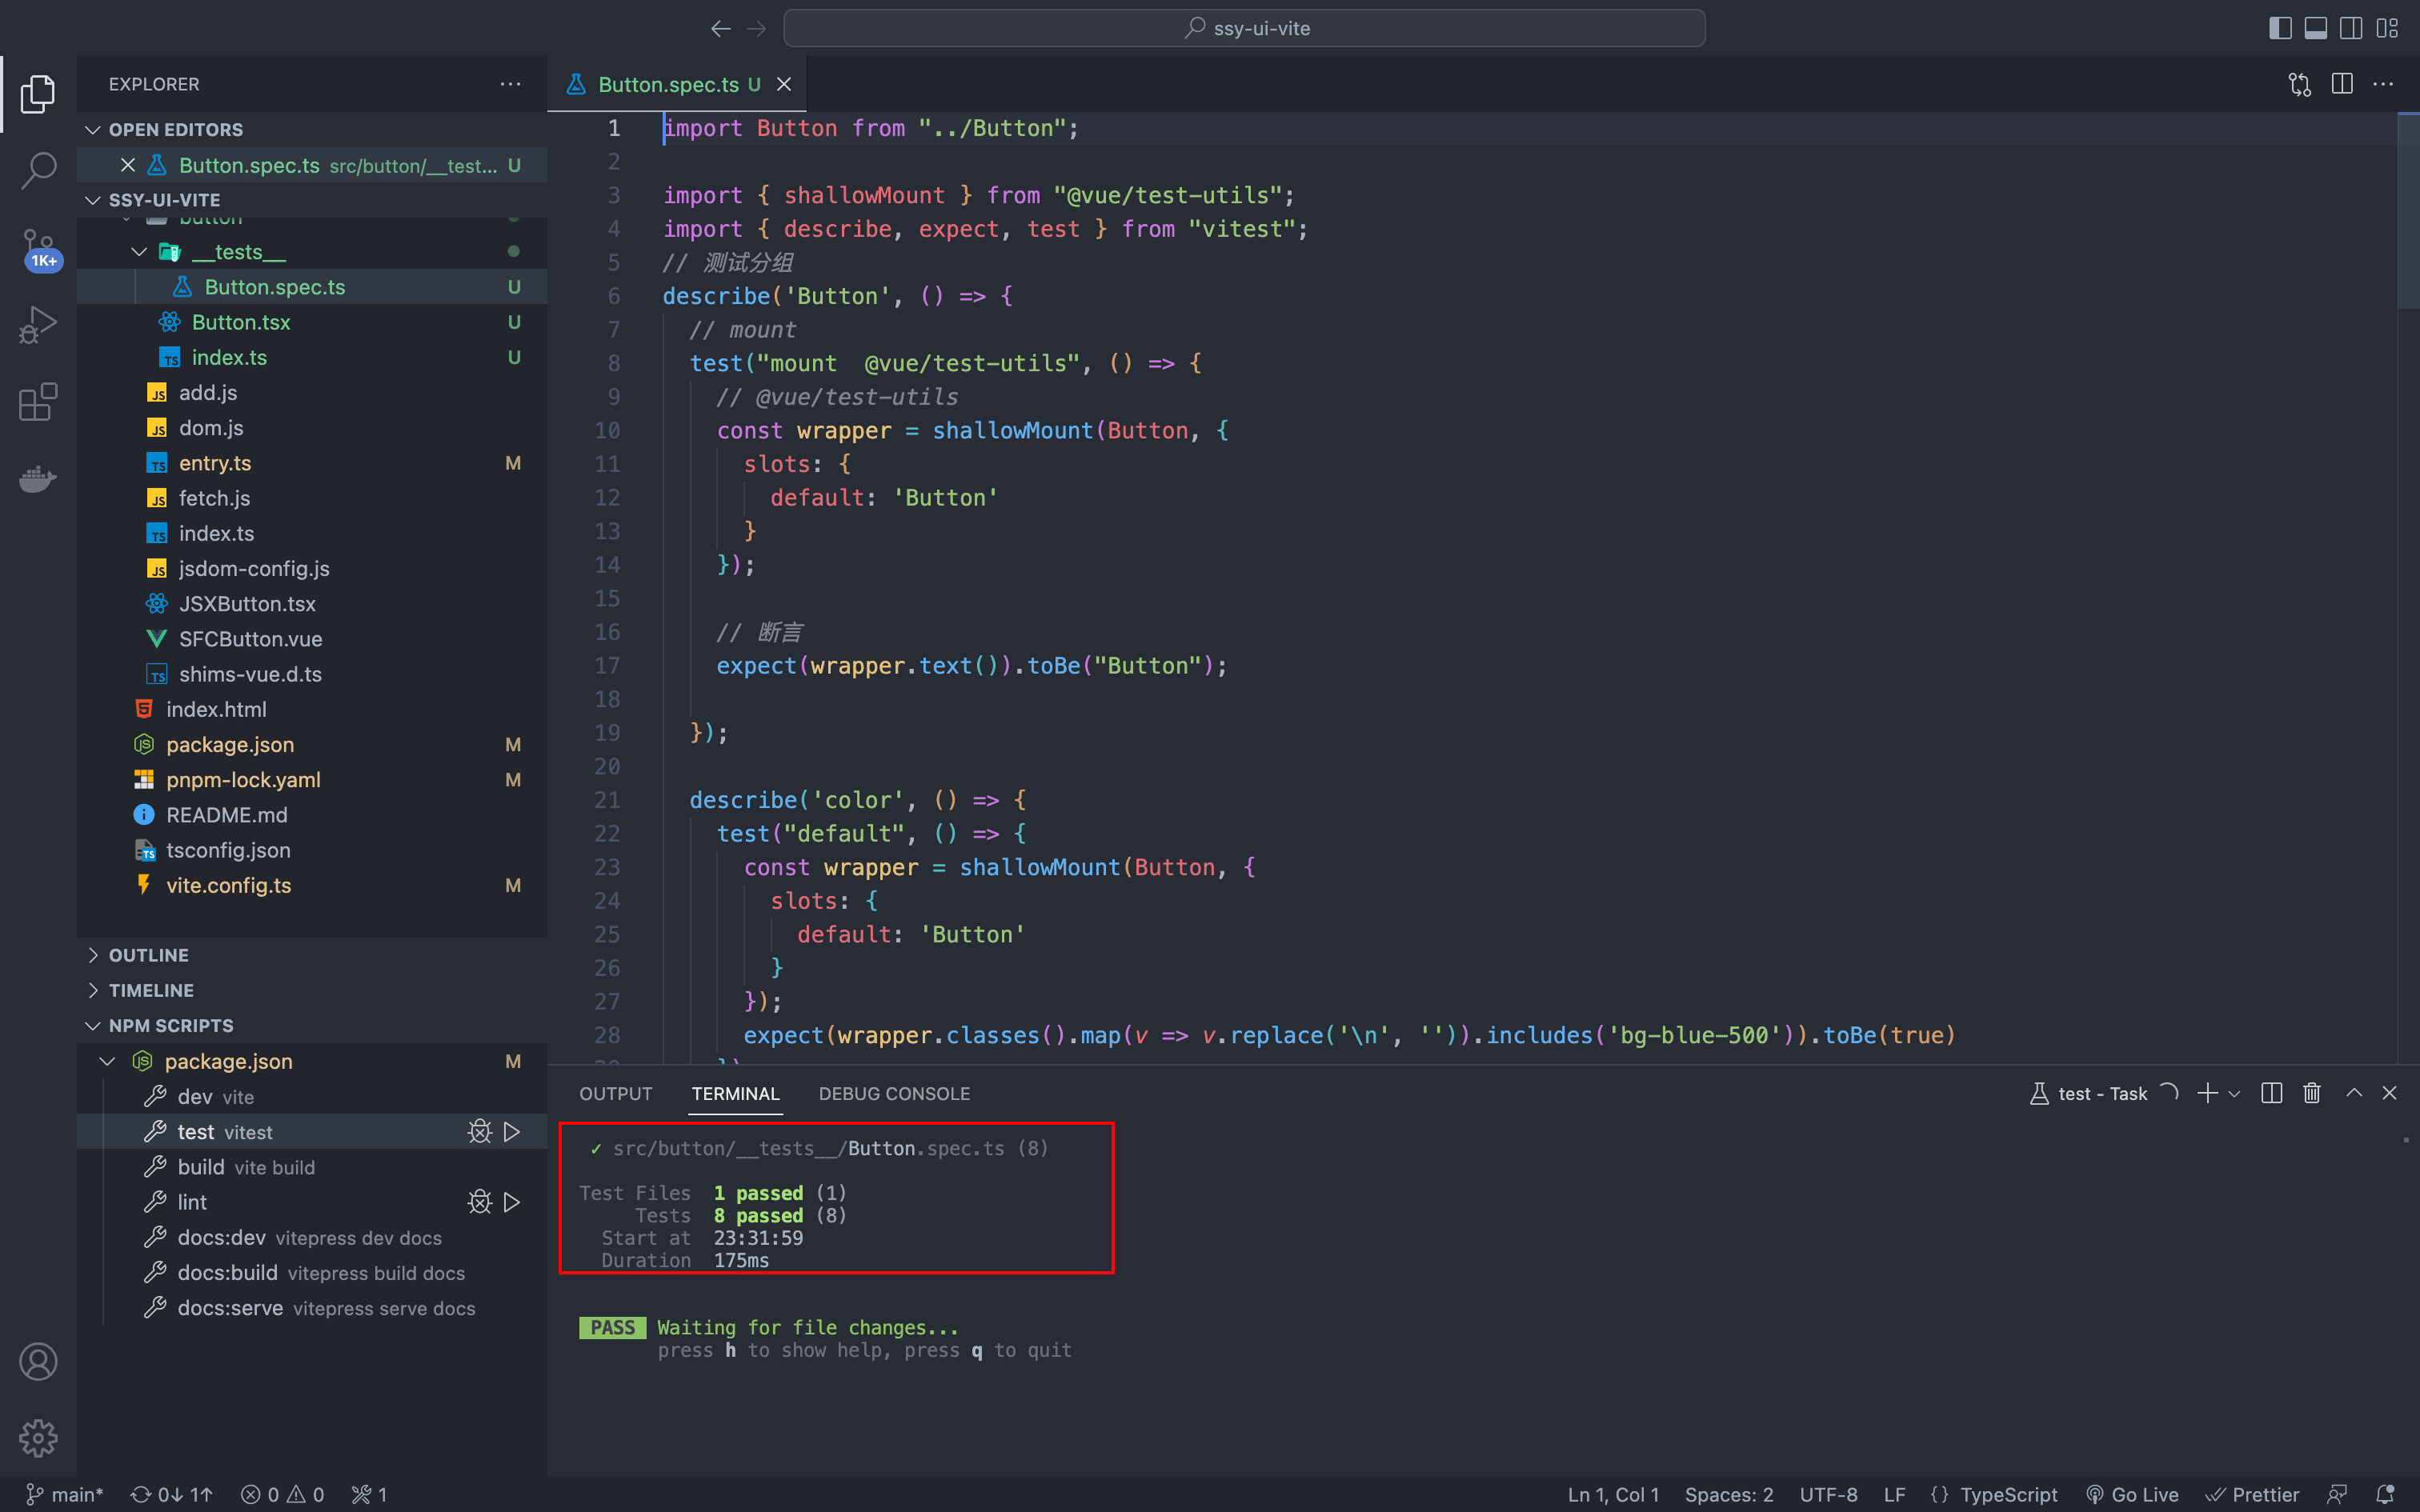
完善 Button.test.ts 文件如下:
import Button from "../Button";

import { shallowMount } from "@vue/test-utils";
import { describe, expect, test } from "vitest";
// 测试分组
describe("Button", () => {
  // mount
  test("mount  @vue/test-utils", () => {
    // @vue/test-utils
    const wrapper = shallowMount(Button, {
      slots: {
        default: "Button",
      },
    });

    // 断言
    expect(wrapper.text()).toBe("Button");
  });

  describe("color", () => {
    test("default", () => {
      const wrapper = shallowMount(Button, {
        slots: {
          default: "Button",
        },
      });
      expect(
        wrapper
          .classes()
          .map((v) => v.replace("\n", ""))
          .includes("bg-blue-500")
      ).toBe(true);
    });

    test("red", () => {
      const wrapper = shallowMount(Button, {
        slots: {
          default: "Button",
        },
        props: {
          color: "red",
        },
      });

      expect(
        wrapper
          .classes()
          .map((v) => v.replace("\n", ""))
          .includes("bg-red-500")
      ).toBe(true);
    });
  });

  describe("round", () => {
    test("default", () => {
      const wrapper = shallowMount(Button, {
        slots: {
          default: "Button",
        },
      });

      expect(
        wrapper
          .classes()
          .map((v) => v.replace("\n", ""))
          .includes("rounded-lg")
      ).toBe(true);
    });

    test("round:true", () => {
      const wrapper = shallowMount(Button, {
        slots: {
          default: "Button",
        },
        props: {
          round: true,
        },
      });

      expect(
        wrapper
          .classes()
          .map((v) => v.replace("\n", ""))
          .includes("rounded-full")
      ).toBe(true);
    });
  });

  describe("plain", () => {
    test("default", () => {
      const wrapper = shallowMount(Button, {
        slots: {
          default: "Button",
        },
      });

      expect(
        wrapper
          .classes()
          .map((v) => v.replace("\n", ""))
          .includes("bg-blue-500")
      ).toBe(true);
    });

    test("plain:true", () => {
      const wrapper = shallowMount(Button, {
        slots: {
          default: "Button",
        },
        props: {
          plain: true,
        },
      });

      expect(
        wrapper
          .classes()
          .map((v) => v.replace("\n", ""))
          .includes("bg-blue-100")
      ).toBe(true);
    });
  });

  test("icon", () => {
    const wrapper = shallowMount(Button, {
      slots: {
        default: "Button",
      },
      props: {
        icon: "edit",
      },
    });

    expect(
      wrapper
        .find("i")
        .classes()
        .map((v) => v.replace("\n", ""))
        .includes("i-ic-baseline-edit")
    ).toBe(true);
  });
});
重新运行,测试结果中可看到有 8 个测试实例通过

编写测试的时候,使用 describe 创建一个子分组,用于测试 color 属性。然后设置不同的 color 属性值,用断言来判断是否输出对应的 css 样式。
剩余的属性测试和 color 的测试非常类似,就不再赘述。
在代码编写阶段,建议只对重点功能进行测试,没必要一定追求过高的测试覆盖率,因为前期过度地测试也会提高开发成本,拖慢开发进度。关于测试覆盖率的问题,会在后续介绍。
到目前为止,我们就把组件库的测试框架搭好了。
复盘
本节我们主要讲了组件库添加测试环境,引入Vitest 实现,整体上 Vitest 和 Jest 风格非常类似。基本上可以 0 学习成本切换。而且得益于通属于 Vite 生态,可以做到通用配置和更好的执行效率。
对于 Vue 框架开发代码的测试,当然可以使用原始的的测试框架进行测试。但是,为了简化测试,也会有人将执行过程和测试断言做进一步的封装, 比如 Vue Test Unit 这样的工具库,利用工具库封装了执行过程可以简化单元测试的编写。
要认真编写描述字符串和合理的使用 describe 测试分组。描述字符串会在测试不通过的时候直接显示到命令行中,直接告诉哪个组件的什么功能没有通过测试,好的测试分组可以有效提高测试的可读性。
最后留一些思考题:
- 如何配置 Vitest 环境?
- 如何使用 @vue/test-utils 完成 Vue3 项目的测试?